1.概述
本文引用地址:
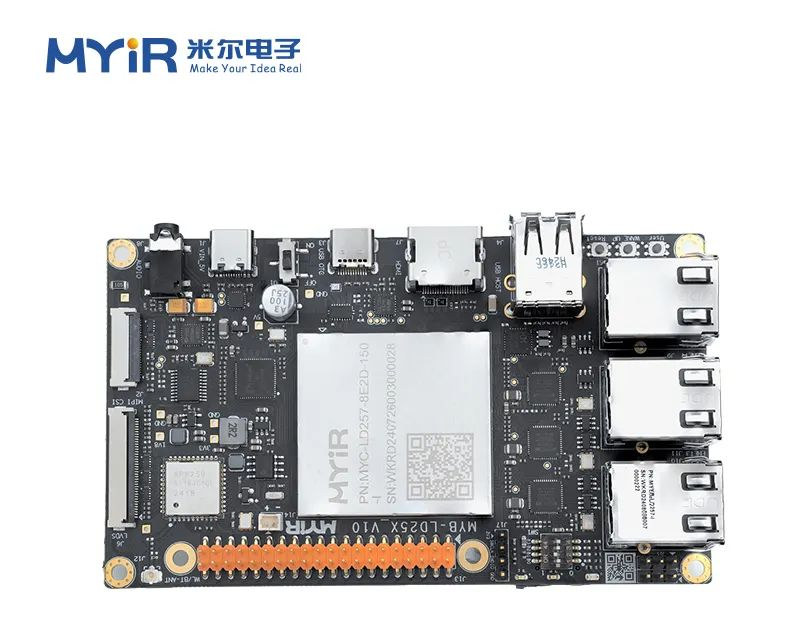
本文将以MYIR的MYC-LD25X核心模块及MYD-LD25X开发平台为例,讲解如何使用STM32CubeMX来实现Developerpackage最小系统和外设资源的配置。
2.修改设备树(接上一期)
查看生成的Bringup工程空文件的设备树,CA35的设备树文件夹,其他的是M33核的工程资料。
我们可以看到生成的设备树文件如下
myir@myir-vm:/mnt/hgfs/ShareWorkspace/stm32mp25x-bringup/Bringup/CA35/DeviceTree/Bringup$tree-l
.
├──kernel
│├──stm32mp257d-bringup-mx.dts
│└──stm32mp257d-bringup-mx-resmem.dtsi
├──optee-os
│├──stm32mp257d-bringup-mx.dts
│├──stm32mp257d-bringup-mx-rcc.dtsi
│├──stm32mp257d-bringup-mx-resmem.dtsi
│└──stm32mp257d-bringup-mx-rif.dtsi
├──tf-a
│├──stm32mp257d-bringup-mx.dts
│├──stm32mp257d-bringup-mx-fw-config.dts
│├──stm32mp257d-bringup-mx-rcc.dtsi
│└──stm32mp25-mx.dtsi
└──u-boot
├──stm32mp257d-bringup-mx.dts
├──stm32mp257d-bringup-mx-resmem.dtsi
└──stm32mp257d-bringup-mx-u-boot.dtsi
4directories,13files
以上的设备树已经配置了大部分内容的工程,但是工程是还无法全部启动,我们需要先把设备树同步到相应的BSP代码中。
stm32mp25x-BringUp-bsp.tar.gz已拷贝并解压到虚拟机:/home/myir。
注:windows和ubuntu之间目录共享
myir@myir-vm:~/stm32mp25x-BringUp-bsp$tree-L2
.
├──Bringup
│├──Bringup.ioc
│├──CA35
│├──CM33
│├──Common
│└──Drivers
├──build
├──FIP_artifacts
│├──arm-trusted-firmware
│├──fip
│├──flash-all.sh
│├──FlashLayout_emmc_stm32mp25x-bringup-mx.tsv
│├──flash.sh
│├──optee
│└──u-boot
├──myir-st-optee
│├──fiptool-stm32mp
│├──Makefile.sdk
│├──myir-st-external-dt
│├──myir-st-optee
│└──README
├──myir-st-tfa
│├──fiptool-stm32mp
│├──Makefile.sdk
│└──tf-a-myir
├──myir-st-uboot
│├──fiptool-stm32mp
│├──Makefile.sdk
│└──u-boot-myir
└──stm32mp-ddr-phy-A2022.11-r0
├──README.HOW_TO.txt
└──stm32mp-ddr-phy-A2022.11
19directories,13files
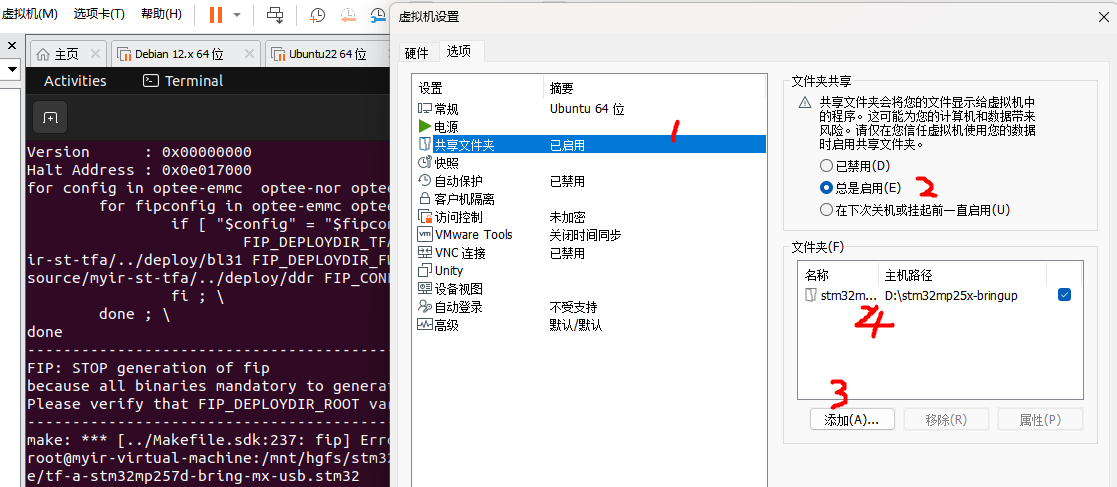
在“虚拟机设置”选项中设置完成后,启动虚拟机执行如下命令进行挂载:
myir@myir-vm#sudovmhgfs-fuse.host://mnt/hgfs-oallow_other
sudo密码为:123456
在虚拟机的/mnt/hgfs目录下已经成功挂载上共享的目录,如未挂载上,可以重新启动下虚拟机。
/home/myir/目录为我这边虚拟机的目录,实际目录以自己本机为准。
tf-a设备树软链接:
myir@myir-vm:/mnt/hgfs/ShareWorkspace#ln-s/mnt/hgfs/ShareWorkspace/Bringup/CA35/DeviceTree/bringup/tf-a/*/home/myir/stm32mp25x-BringUp-bsp/myir-st-tfa/tf-a-myir/fdts/
Optee-os设备树stm32mp257d-bringup-mx.dts和stm32mp257d-bringup-mx-rcc.dtsi软链接:
myir@myir-vm:/mnt/hgfs/ShareWorkspace#ln-s/mnt/hgfs/ShareWorkspace/Bringup/CA35/DeviceTree/bringup/optee-os/stm32mp257d-bringup-mx.dts/home/myir/stm32mp25x-BringUp-bsp/myir-st-optee/myir-st-optee/core/arch/arm/dts/
root@myir-vm:/mnt/hgfs/ShareWorkspace#ln-s/mnt/hgfs/ShareWorkspace/Bringup/CA35/DeviceTree/bringup/optee-os/stm32mp257d-bringup-mx-rcc.dtsi/home/myir/stm32mp25x-BringUp-bsp/myir-st-optee/myir-st-optee/core/arch/arm/dts/
Optee-os设备树stm32mp257d-bringup-mx-resmem.dtsi和stm32mp257d-bringup-mx-rif.dtsi直接使用SourceCode压缩包Optee-os目录中的文件,可通过软链接或者拷贝的方式放到stm32mp25x-BringUp-bsp/myir-st-optee/myir-st-optee/core/arch/arm/dts/目录下。
Uboot设备树软链接:
myir@myir-vm:/mnt/hgfs/ShareWorkspace#ln-s/mnt/hgfs/ShareWorkspace/Bringup/CA35/DeviceTree/bringup/u-boot/*/home/myir/stm32mp25x-BringUp-bsp/myir-st-uboot/u-boot-myir/arch/arm/dts/
Kernel设备树软链接:
Note:STM32CubeMX的规则是先生成Kernel的dts,然后将生成的dts文件拷贝到u-boot目录下,也就是说u-boot的设备树stm32mp257d-bringup-mx.dts是从kernel目录拷贝过来的,所以在U-Boot阶段修改设备树,添加Usercode时,请同步修改kernel的设备树或者将修改好的设备树拷贝到Kernel目录,防止下次使用CubeMX生成设备树的时候,u-boot部分的修改被kernel未修改的设备树覆盖。
2.1.配置和编译TF-A
需要手动添加TF-A阶段的串口配置的usercode.使用文本编辑工具打开生成的打开TF-A设备树(BringupCA35DeviceTreeBringuptf-astm32mp257d-bringup-mx.dts)
添加头文件
/*USERCODEBEGINincludes*/
#include/"stm32mp25xf.dtsi/"
#include/"stm32mp25-pinctrl.dtsi/"
/*USERCODEENDincludes*/
在”USERCODEBEGINroot”位置添加”chosen”和”aliases”节点:
/*USERCODEBEGINroot*/
aliases{
serial0=&usart2;
};
chosen{
stdout-path=/"serial0:115200n8/";
};
/*USERCODEENDroot*/
增加PMIC配置
&i2c7{
pinctrl-names=/"default/";
pinctrl-0=<&i2c7_pins_mx>;
status=/"okay/";
/*USERCODEBEGINi2c7*/
pmic2:stpmic@33{
compatible=/"st,stpmic2/";
reg=<0x33>;
status=/"okay/";
regulators{
compatible=/"st,stpmic2-regulators/";
vddcpu:buck1{
regulator-name=/"vddcpu/";
regulator-min-microvolt=<800000>;
regulator-max-microvolt=<910000>;
regulator-always-on;
};
vddcore:buck2{
regulator-name=/"vddcore/";
regulator-min-microvolt=<820000>;
regulator-max-microvolt=<820000>;
regulator-always-on;
};
vddgpu:buck3{
regulator-name=/"vddgpu/";
regulator-min-microvolt=<800000>;
regulator-max-microvolt=<900000>;
regulator-always-on;
};
vddio_pmic:buck4{
regulator-name=/"vddio_pmic/";
regulator-min-microvolt=<3300000>;
regulator-max-microvolt=<3300000>;
regulator-always-on;
};
v1v8:buck5{
regulator-name=/"v1v8/";
regulator-min-microvolt=<1800000>;
regulator-max-microvolt=<1800000>;
regulator-always-on;
};
vdd2_ddr:buck6{
regulator-name=/"vdd2_ddr/";
regulator-min-microvolt=<1100000>;
regulator-max-microvolt=<1100000>;
};
v3v3:buck7{
regulator-name=/"v3v3/";
regulator-min-microvolt=<3300000>;
regulator-max-microvolt=<3300000>;
regulator-always-on;
};
vdda1v8_aon:ldo1{
regulator-name=/"vdda1v8_aon/";
regulator-min-microvolt=<1800000>;
regulator-max-microvolt=<1800000>;
regulator-always-on;
};
vdd_emmc:ldo2{
regulator-name=/"vdd_emmc/";
regulator-min-microvolt=<3300000>;
regulator-max-microvolt=<3300000>;
regulator-always-on;
};
vdd1_ddr:ldo3{
regulator-name=/"vdd1_ddr/";
regulator-min-microvolt=<1800000>;
regulator-max-microvolt=<1800000>;
regulator-enable-ramp-delay=<1000>;
};
vdd3v3_usb:ldo4{
regulator-name=/"vdd3v3_usb/";
regulator-min-microvolt=<3300000>;
regulator-max-microvolt=<3300000>;
regulator-always-on;
};
v5v_hdmi:ldo5{
regulator-name=/"v5v_hdmi/";
regulator-min-microvolt=<2000000>;
regulator-max-microvolt=<2000000>;
};
vdd_sdcard:ldo7{
regulator-name=/"vdd_sdcard/";
regulator-min-microvolt=<3300000>;
regulator-max-microvolt=<3300000>;
regulator-always-on;
};
vddio_sdcard:ldo8{
regulator-name=/"vddio_sdcard/";
st,regulator-bypass-microvolt=<3300000>;
regulator-min-microvolt=<3300000>;
regulator-max-microvolt=<3300000>;
regulator-always-on;
};
/*USERCODEENDi2c7*/
};
&ddr{
status=/"okay/";
/*USERCODEBEGINddr*/
vdd1-supply=<&vdd1_ddr>;
vdd2-supply=<&vdd2_ddr>;
vddq-supply=<&vdd2_ddr>;
/*USERCODEENDddr*/
};
使用文本编辑工具打开生成的打开TF-A设备树(BringupCA35DeviceTreeBringuptf-astm32mp257d-bringup-mx-fw-config.dts)
本次配置不涉及防火墙内容,因此屏蔽如下内容:
/*st-mem-firewall{
bl31_context:bl31-context@81ff0000{
reg=<0x00x81ff00000x00x10000>;
st,protreg=;
};
op_tee:op-tee@82000000{
reg=<0x00x820000000x00x2000000>;
st,protreg=;
};
*/
新增如下内容:
/*USERCODEBEGINroot*/
dtb-registry{
soc_fw-config{
load-address=<0x00x81fc0000>;
max-size=<0x40000>;
};
tos_fw{
load-address=<0x00x82000000>;
max-size=<0x2000000>;
};
st-mem-firewall{
bl31_context:bl31-context@81fc0000{
reg=<0x00x81fc00000x00x40000>;
st,protreg=;
};
op_tee:op-tee@82000000{
reg=<0x00x820000000x00x2000000>;
st,protreg=;
};
/*USERCODEENDroot*/
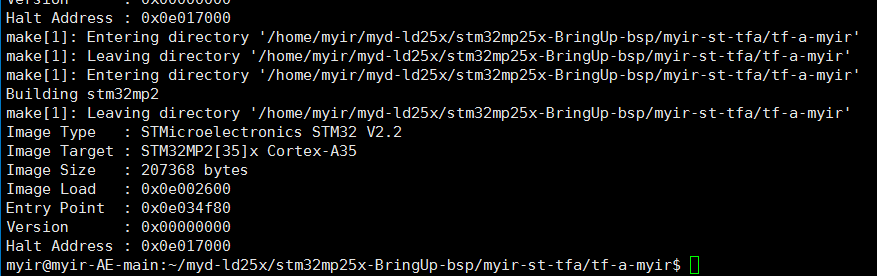
以上已完成配置,就可以进行TF-A的单独编译。
myir@myir-vm:cd/home/myir/stm32mp25x-BringUp-bsp/myir-st-tfa/tf-a-myir
myir@myir-vm:~/stm32mp25x-BringUp-bsp/myir-st-tfa/tf-a-myir$source/opt/st/myd-ld25x/4.2.4-snapshot/environment-setup-cortexa35-ostl-linux
myir@myir-vm:~/stm32mp25x-BringUp-bsp/myir-st-tfa/tf-a-myir$exportFIP_DEPLOYDIR_ROOT=../../FIP_artifacts
myir@myir-vm:~/stm32mp25x-BringUp-bsp/myir-st-tfa/tf-a-myir$exportFWDDR_DIR=../../stm32mp-ddr-phy-A2022.11-r0/stm32mp-ddr-phy-A2022.11
myir@myir-vm:~/stm32mp25x-BringUp-bsp/myir-st-tfa/tf-a-myir$make-f$PWD/../Makefile.sdkDEPLOYDIR=$FIP_DEPLOYDIR_ROOT/arm-trusted-firmwareTF_A_CONFIG=/"optee-emmcusb/"TF_A_DEVICETREE=stm32mp257d-bringup-mxELF_DEBUG_ENABLE=/'1/'stm32metadata
注:已将上述TF-A单独编译的命令存放在/home/myir/stm32mp25x-BringUp-bsp/myir-st-tfa/tf-a-myir/build.sh
来源:头条娱乐